How to Learn Articulate Storyline 360
By Devlin Peck · Updated
Want to learn Articulate Storyline 360?
Storyline is the most popular eLearning authoring tool and is incredibly important for instructional designers. In this article, you’ll learn how to master the tool. We’ll also go through projects along the way that will help you practice what you learn.
Want to learn more? Read on.
Why is Articulate Storyline so important for instructional designers?
Articulate Storyline 360 is currently the most popular rapid eLearning tool on the market, and the skillset is in high demand for instructional designers. A survey I did with hiring managers in the industry shows that 86.1% of them rate Storyline as one of the three tools and technologies instructional designers should be familiar with.
In other words, if you’re looking for an ID job, you’ll want to add Storyline to your toolkit.
Here you’ll learn how to use it fast and well.
Is Articulate Storyline easy to learn?
It's relatively easy to get up and running with the tool. However, the power of using Storyline lies in the interactivity of the tool. The basic functions are pretty much like PowerPoint, but when you start using the layers, variables, triggers, and conditions, you’ll start using Storyline to its full extent.
So, while the basics of the tool are simple, it takes time to learn the rest. The best way is to learn by doing, so practice your skills by building different mock projects (like the ones we’ll cover in this article).
How long does it take to learn Storyline?
As the basics of Storyline are relatively easy to learn, you can be up and running with Storyline in no time. However, it’s the advanced features that will take you to the next level.
That said, the time it takes to learn Storyline depends on a few things. Are you learning from tutorials online? Or have you enrolled in a course to learn Storyline? It might take longer to learn on your own, especially to understand how industry professionals use the tool.
Either way, the first step is to get a good understanding of Storyline. How do you get started? Here’s what you need to know.
What is the best way to learn Articulate Storyline?
How do you start using Storyline in the best way possible?
Below, I’m sharing the steps to take to learn Storyline. I’ve broken them down into basic and intermediate steps. And, at the end, you get my top recommendations for Storyline video tutorials.
Note: You need to download and install Storyline before you begin (you can start with the free trial). In this short video, I show you how to do it:
Once you’re ready, let’s start from the basics.
Basics of using Storyline
Start by consulting the Storyline documentation. The tool has detailed documentation that teaches you pretty much everything you need to know about using it.
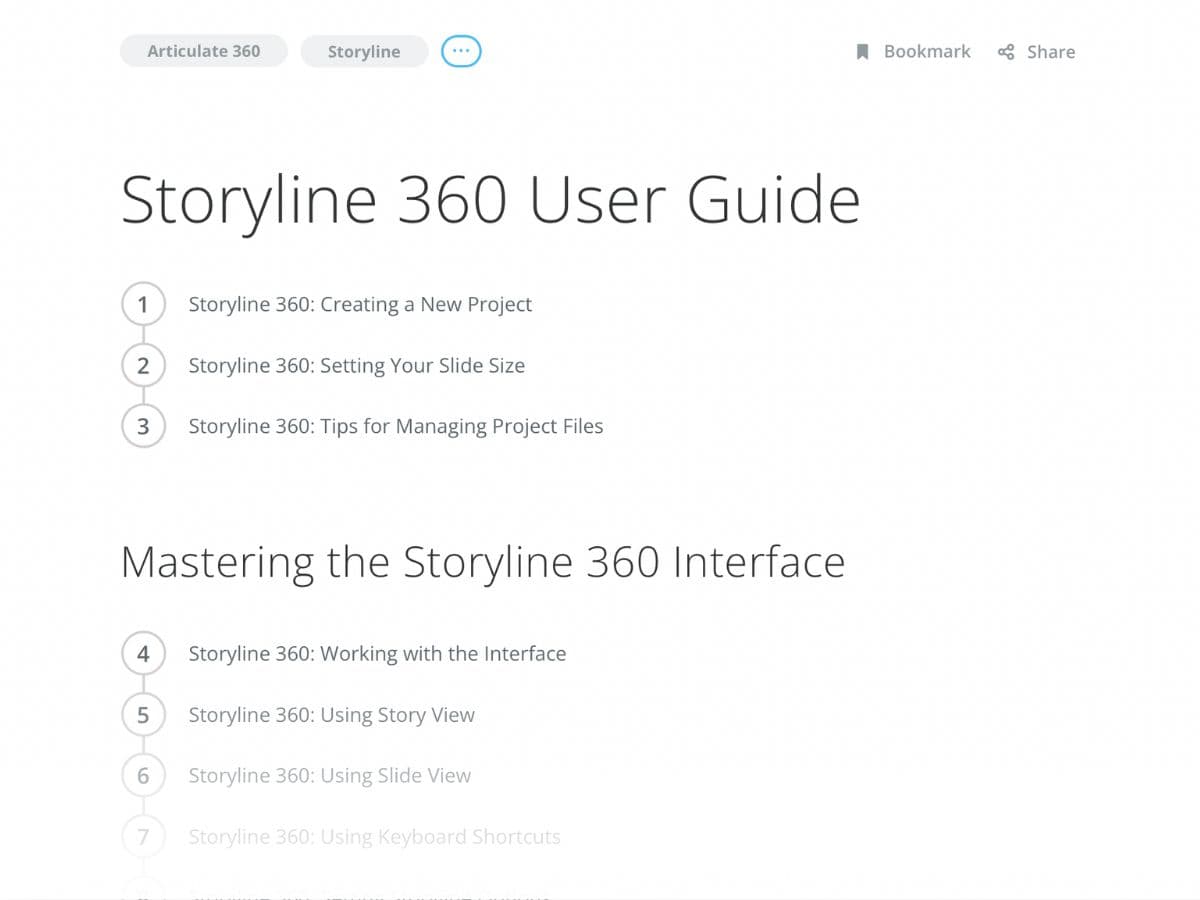
Now, let’s say you have your free Storyline trial and you’re at square one. Open up Storyline in one window and the documentation in another so that you can move between the two.
To begin using the documentation, start with the first three intro lessons. When you go through these lessons, practice after each of them. Practice is important every step of the way because reading the documentation won’t be good enough–you need to use the tool to learn it.
For example, if the documentation talks about adding a text box, add that text box and play around with it. That’s how you’ll get muscle memory and work your way toward mastery.
When you’re done with the intro lessons, go through the “Mastering the Storyline 360 Interface” and “Working with Slides and Layers” sections. Working with Slides is quite similar to PowerPoint, but Layers is an added feature in Storyline that you’ll use a lot.
Next, look at the section “Working with Shapes, Captions, Text Boxes, and Tables.” Then, you’ll go through the content sections, ”Working with Pictures,” “Working with Videos,” “Working with Audio,” and “Working with Text.” Use these to practice by adding each type of media to the screen. Make sure you go through them at your own pace because they are very foundational skills that you should know how to use.
Those are the basic skills. But what about more advanced features? Here’s what you need to know.
Intermediate Storyline skills
Once you know the basics and are familiar with the interface, it’s time to move to the more intermediate skills. This is where Storyline will start to get more interesting.
A word of warning, though: If you want to call yourself a Storyline developer, it’s really important that you don’t skip any of these sections before moving to the interactive objects. It can feel tempting to do so but the fundamental things are important to know.
Formatting, Sizing, and Positioning Objects
First, look at “Formatting, Sizing, and Positioning Objects.” Before we get into animations and interactivity, it’s good to have these basics down and know how to position your elements.
Customizing Your Course Design
When you’re done with those, we get into “Customizing Your Course Design.” This section teaches you how to work with slide masters and templates, which help you speed up your workflow and keep things consistent.
Spend time in this section because a lot of new Storyline developers don’t know these things are here–and that can lead to a lot of confusion down the line.
Timeline, States, and Notes
When you’re done with the section, we’ll get into “Timeline, States, and Notes.”
Understanding how the timeline works is important, so practice moving things around in the timeline. States are also important. You can use triggers to change the states. For example, the state of a box may be red or green, but the color changes if you click on a button.
Applying Animations and Slide Transitions
Next, go on to “Applying Animations and Slide Transitions.” This isn’t a difficult section, but you should still know how the timeline works before you start playing around with animations, so make sure you review the previous section before moving on to this one.
I recommend spending time on animations and timelines and getting a feel for how they work. For example, if you have an entrance animation and an exit animation but the timeline is only five seconds long, you’ll have a problem, so make sure you understand how these work.
Adding interactive objects
Now, once you have gone through these “PowerPoint” features (as I like to call them), it’s time to move into the “Adding Interactive Objects” section. This section includes the features that really make Storyline stand out from a tool like PowerPoint.
First, you have the four sections on the built-in quizzing feature. I don’t personally use these features much because I build quizzes with the custom features, but they’re good for rapidly building scored quizzes.
So much eLearning is about answering quizzes and getting 80% or above to pass. These built-in features are a good way to do that, and so you should go through the documentation and practice using these features. After all, you’ll likely need to use these features when you’re working on a real-world project.
Player, Preview, and Publish
Next, go through the “Customizing the Player” and “Previewing and Publishing a Course” sections.
Start by customizing the player. This is whatever is around the slides, such as links to resources or buttons and controls to change the volume. You can also get rid of the player completely, and that’s what you’ll learn in this section.
The next section is about previewing and publishing a course. If you're publishing courses for accessibility, you'll also want to know how to generate closed captions in Storyline.
And that’s it. These are the main sections of the documentation I suggest you take a look at. If you have the time, explore the other sections. It’s important, but the sections I mentioned are the minimum and will come up often.
There’s one more thing left, though… practice! And that’s what you’ll learn next.
Practice your skills
Once you’ve gone through the documentation, you’ll get into practice by building small projects. The five mini-projects I describe below are a great place to get started.
Practice tasks
First things first: start simple. For the first practice test, use states and triggers and maybe even some layers to build tab interactions.
This is where you’d have a box and three different tabs at the top. When you click on one tab, the content in the box changes.
A task like this one is a great way to practice states and triggers. In fact, I recommend doing this as one of your first projects.
Then, do a custom drag-and-drop interaction to test your understanding of triggers, states, and layers. When you understand them, you can build any interaction you want and you won’t need to rely on the built-in interaction types. Have a column on the left and on the right where you can drag text between these columns. (For example, between one “bad” and one “good” column.)
Next, we have custom slide and feedback masters. Go into the slide masters and try creating one yourself and then apply it to slides. This will help you build one thing in a slide master instead of copying and pasting the same thing across several slides. The earlier you get comfortable working with masters, the better.
Next up, build a built-in quiz with a results screen, a fairly straightforward task.
Then, look at how to build a custom menu from scratch. Keep it simple and build your own sidebar to practice with triggers.
Variables and conditions
Now, a lot of people stop here and think “I’m good.” But that means you’re really limiting yourself because Storyline can do so much more. To really take advantage of the features, you’ll need to understand variables and conditions. I recommend going this extra mile and learning how to use these things well to become one of the most in-demand instructional designers and eLearning developers.
To explain these concepts: variables are logical parameters. For example. “if variable A is true, then jump to X.” The condition is the “IF” statement (if A is true or false).
Here are a few projects I recommend for you:
Start by building a confidence meter. You’d ask someone, “How confident are you with this material?”
If the answer is above five on a scale from 1-10, you’d bring them right into the quiz. If the answer is below five, you’d bring them into a review section.
The variable is how confident they are and you conditionally bring them to different scenes depending on the variable.
Another task you can work on is an avatar selector. The user can choose between three avatars. When they choose one, the program stores the avatar in the variable and in the next slides, the avatar will change depending on what the variable holds.
You can then move on to a BuzzFeed-style quiz. Here, the user answers questions like “Which personality type are you?” and are shown 5-10 questions. Depending on their answers, they are then brought to different slides according to the different variables. If you want to push these branching skills further, you can develop a chatbot in Articulate Storyline.
I also recommend that you do a custom quiz with a fail/pass results screen. Users see either the fail or pass screen based on their score.
Finally, take the custom menu screen you built previously to the next level and make it track progress. So you have different variables for slides and change the state of the menu bar depending on how the users progress.
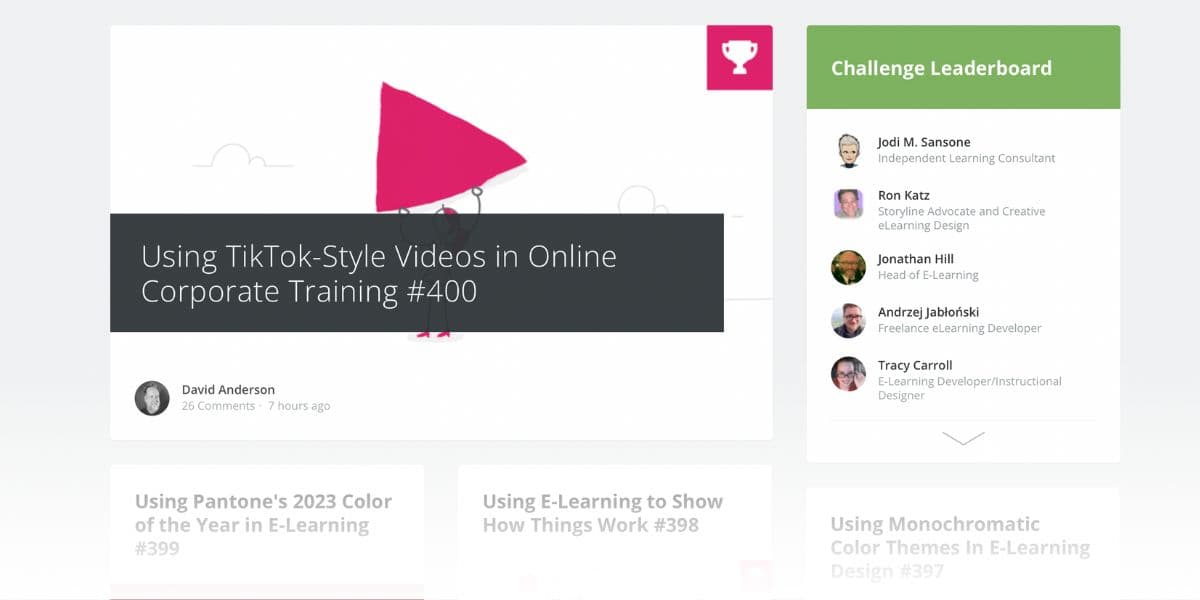
Those are a few tasks you can get started with right away. And once you’re done with them, you can play around with the eLearning Challenges (ELH) and work on even more tasks (after all, this is how you’ll learn). ELHs are posted weekly in the Articulate Storyline community and they’re an excellent reference point for those who’re learning Storyline.
And here are other tasks you can take a look at:
Create a playable piano in Storyline:
How to create an escape room in Storyline:
How to create a memory game in Storyline:
Next up: The top Storyline video tutorials.
Storyline 360 video tutorials
What are some great Storyline video tutorials?
You can check out my YouTube channel for more content on Storyline.
These videos might interest you:
How to Learn Articulate Storyline 360
Getting Started with Articulate Storyline 360
And my playlist:
Articulate Storyline 360 Tutorials - How to Use Articulate Storyline 360
Other resources I recommend include Mark Spermon’s and Ashley Chiasson’s YouTube channels.
Over to you!
There you have it. Now you know how to use Storyline in your projects.
One last reminder: Don’t forget to practice! In the end, that’s what it comes down to.
Want to get started fast with Storyline?
The Storyline Project Lab is an in-depth course that helps you learn Storyline and create stand-out projects for your portfolio along the way.
Here’s what my student Nicole said after going through the Lab:
“I will never need to go back to my old career, and I owe so much of my new knowledge and confidence to Devlin’s Project Lab.”
Explore Articulate Storyline & xAPI Development
Every guide in this series, all free.
xAPI
- Custom xAPI Statements in Articulate Storyline - First Impressions
Learn what a xAPI is and how you can now use it in Articulate Storyline 360 in this video
- How to Send Custom xAPI Statements in 2025
Learn about how what xAPI is, how to create xAPI statements, and how to send xAPI statements in this detailed tutorial guide.
- Send an xAPI Statement from a Glide App Button
In this tutorial, you'll learn how to add a button to a Glide App that sends an xAPI statement to Watershed LRS whenever it's selected.
- The Full Guide to xAPI and Storyline
Do you need to send custom xAPI statements from your Storyline course? Learn how to write and send them, then bring that data back into your eLearning.
- Common xAPI & Storyline Troubleshooting Steps
This page lists the most common issues and associated troubleshooting steps that you can use when sending custom xAPI statements from a Storyline course.
- Create an xAPI-Powered Leaderboard in Storyline
In this final xAPI and Storyline tutorial, learn how to pull data from the LRS to create an xAPI-enabled leaderboard in your Articulate Storyline course.
- How to Query the LRS (xAPI Tutorial)
Learn how to query your Learning Record Store (LRS) to work with the xAPI data you collect, a prerequisite for adaptive learning, leaderboards, and dashboards.
- Managing Your Project: xAPI and Storyline
This tutorial teaches you how to manage your Articulate Storyline xAPI project, including how to organize your xAPI verbs, JavaScript file, and functions.
- How to Measure Duration with xAPI, Storyline, and JS Timers
This tutorial teaches you how to measure course and slide duration in a Storyline course using xAPI and JavaScript timers. No coding expertise required.
- How to Collect Quiz Score Info with xAPI and Storyline
This tutorial teaches you how to collect quiz score information using xAPI and Storyline. Particularly, we look at min, max, raw, and scaled score.
- How to Collect Text Responses with xAPI and Storyline
This tutorial teaches you how to collect a user's open text response in a Storyline course using xAPI. It uses the result element's "response" object to do so.
- How to Collect a User's Name & Email from a Storyline Course
Part 2 of the Getting Started with xAPI series. Use JavaScript to populate an xAPI statement with the learner's name and email in a Storyline course.
- How to Write an xAPI Statement from Scratch
Part 1 of 3 in the Getting Started with xAPI series. Learn how to write an Experience API (xAPI) statement from the ground up. No JavaScript expertise needed.
Articulate Storyline
- How to Generate Closed Captions in Articulate Storyline 360
Three ways to add closed captions in Articulate Storyline 360: generate them with AI Assistant, import an SRT file, or use the built-in editor. Plus WCAG tips.
- How to Develop a Chatbot in Articulate Storyline: 3 Ways
Three ways to build a chatbot in Articulate Storyline: simulate one with triggers and layers, connect ChatGPT with JavaScript, or embed a no-code AI simulation.
- Articulate Rise vs Storyline: Which Should You Use in 2026?
Storyline 360 or Rise 360? Get a clear verdict, a side-by-side comparison table, the 2026 AI features, current pricing, and which tool to learn first.
- Generate a PDF Certificate from an eLearning Course
Learn how to generate a dynamic PDF certificate from an Articulate Storyline 360 course. The certificate includes the user's name and the date.
- How to Collect Activity Info with xAPI and Storyline
Learn how to collect additional activity information using xAPI and Storyline: the Object Type, Activity Description, and Activity Type of an xAPI statement.
- How to Send an xAPI Statement from a Storyline Course
Part 3 of 3 in the Getting Started with xAPI series. Learn how to send an xAPI statement from an Articulate Storyline project to Veracity Learning LRS.
eLearning Development
- How to Track eLearning Without an LMS
Learn how to collect data from an eLearning course without uploading the course to an LMS. Track completions, question responses, duration, and more.